Creating a Weather AI Agent
So far we've seen how to create a simple chatbot, modify its code, and even creating your own custom block. In this tutorial, we'll tie them up together to build an agent that is capable of utilizing the weather block as a tool. Therefore, if you haven't done what was covered in the previous tutorial, you'll need to make sure you do.
First things first
We'll need to tweak the custom code implementation a little bit for our LLM to be able to call it as a function. Therefore in the Weather Block's implementation where we are parsing the incoming input, we'll change it from:
class CustomBlock(BaseImplementation):
    ...
    def run(self, input_:dict=None):
        input_ = list(input_.values())[0]
        ...
to:
class CustomBlock(BaseImplementation):
    ...
    def run(self, input_:dict=None):
        input_ = list(input_.values())[0]
        input_ = json.loads(input_)['location']
        ...
Therefore the final code should look as follow that you can simply copy over. We'll cover in just a bit why we're doing this.
Custom code snippet to copy
import json
import requests

from implementations.base import (
    BaseImplementation,
    BlockMetadata,
    Field,
    FieldType
)

class CustomBlock(BaseImplementation):
    display_name = "Custom Weather Block"
    block_type = 'process'
    block_metadata = BlockMetadata([
        Field(
            name='api_key',
            display_name='API Key',
            type=FieldType.PASSWORD.value,
            show_in_ui=False
        ),
        Field(
            name='units',
            display_name='Units',
            type=FieldType.TEXT.value,
            default_value='metric',
            show_in_ui=False
        ),
    ])

    def __init__(self, run_config:dict=None) -> None:
        super().__init__()
        self.run_config = run_config
        self.api_key = run_config.get('api_key')
        self.units = run_config.get('units')

    def run(self, input_:dict=None):
        input_ = list(input_.values())[0]
        input_ = json.loads(input_)['location']

        base_url = "https://api.openweathermap.org/data/2.5/weather"
        # Defining parameters for the API call
        params = {
            'q': input_,
            'appid': self.api_key,
            'units': self.units  # Use 'imperial' for Fahrenheit
        }

        # Make the GET request
        response = requests.get(base_url, params=params)

        # Check if the request was successful
        if response.status_code == 200:
            data = response.json()
            # Extract temperature from the response data
            temperature = data['main']['temp']
            return temperature
        else:
            print(f"Error: {response.status_code} - {response.json().get('message')}")
            return None
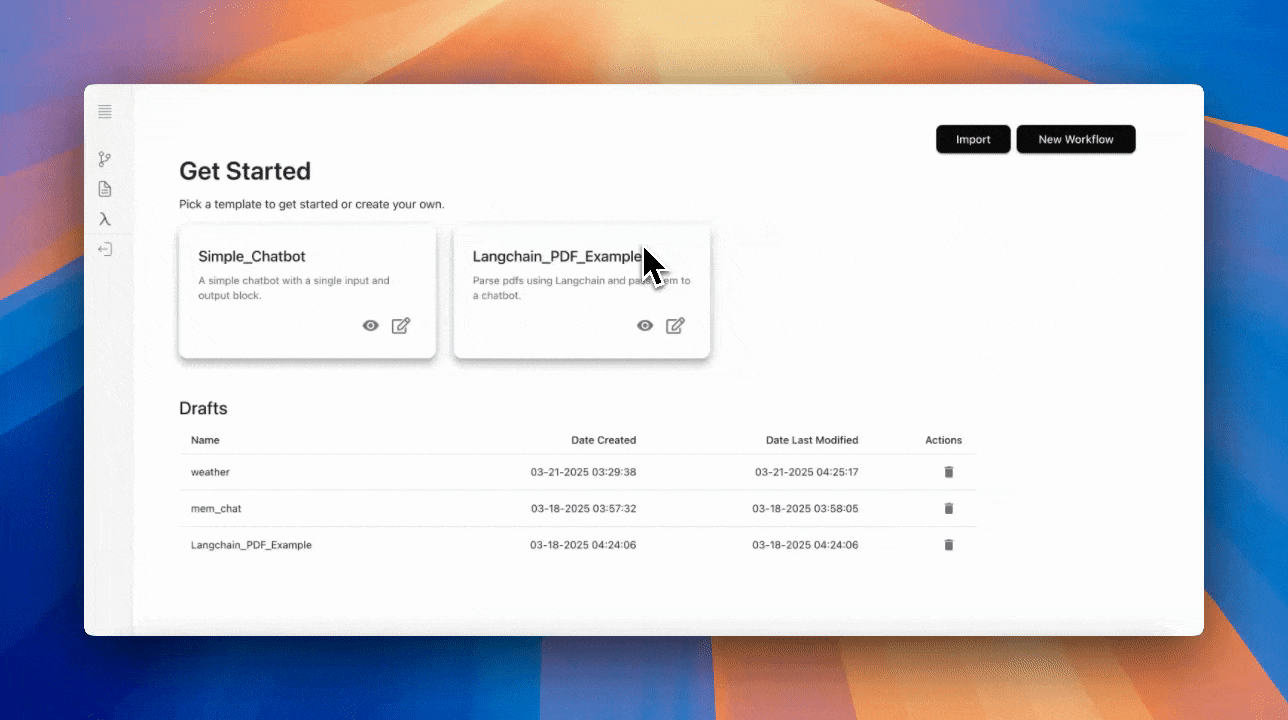
Create a new Workflow
Once you are done saving the new code. Create a new workflow, and select the OpenAI block similar to
the first tutorial, or you can simply select the Simple_Chatbot example
from the example templates.
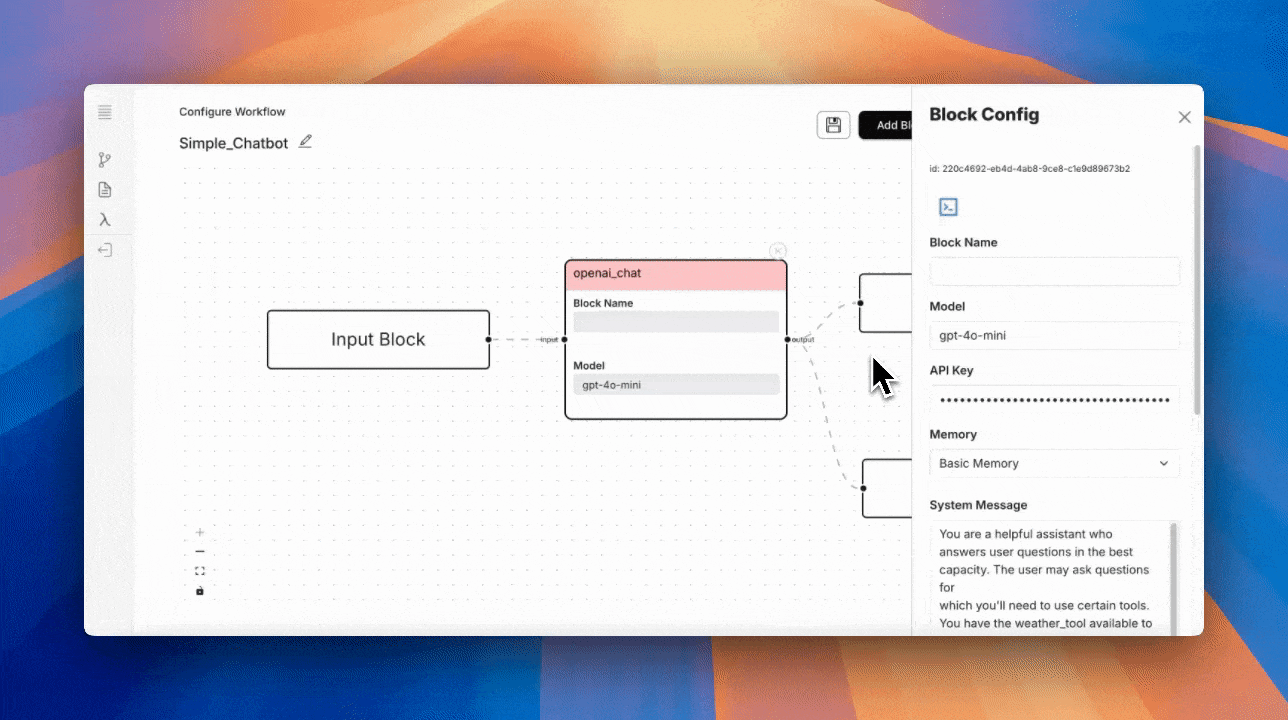
Configure your API key and set the Memory as Basic Memory. This will allow the chatbot to remember the conversation.
Add a Tool
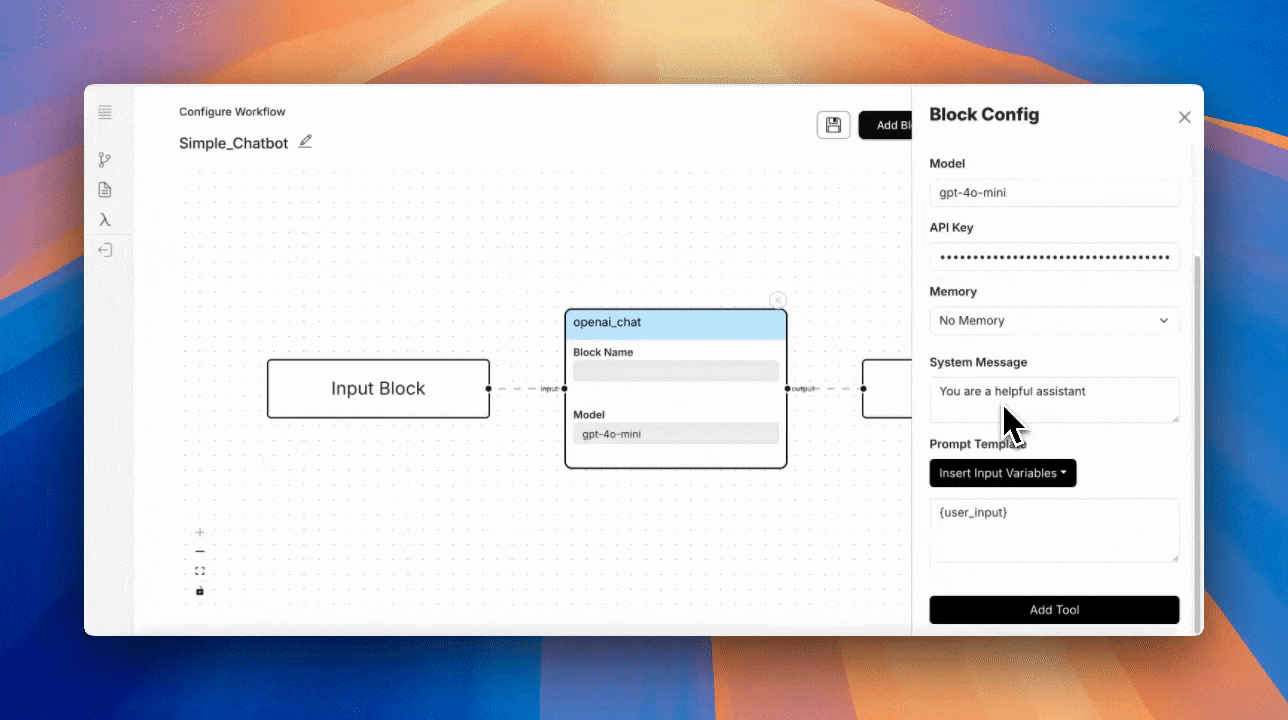
Set the System Prompt
For this tutorial, we will create an agent that does one of 3 things:
- Answers general user questions
- However if the user asks for the weather for a given location, it should use the tool we just created.
- Furthermore, to make things more interesting, if the user asks for a recipe, it will query the weather api to get the current weather for where the user is, and suggest a recipe based on the weather.
Therefore we'll have the following system prompt:
You are a helpful assistant who answers user questions in the best capacity. The user may ask questions for
which you'll need to use certain tools. You have the weather_tool available to you. Based on this, anytime
the user asks for the current temperature, you will use the tool. To be even more awesome, if the user asks to make
a recipe, your goal is to figure out where the user is located, and based on that information, you will use the weather tool
to suggest a recipe that suits the current weather.
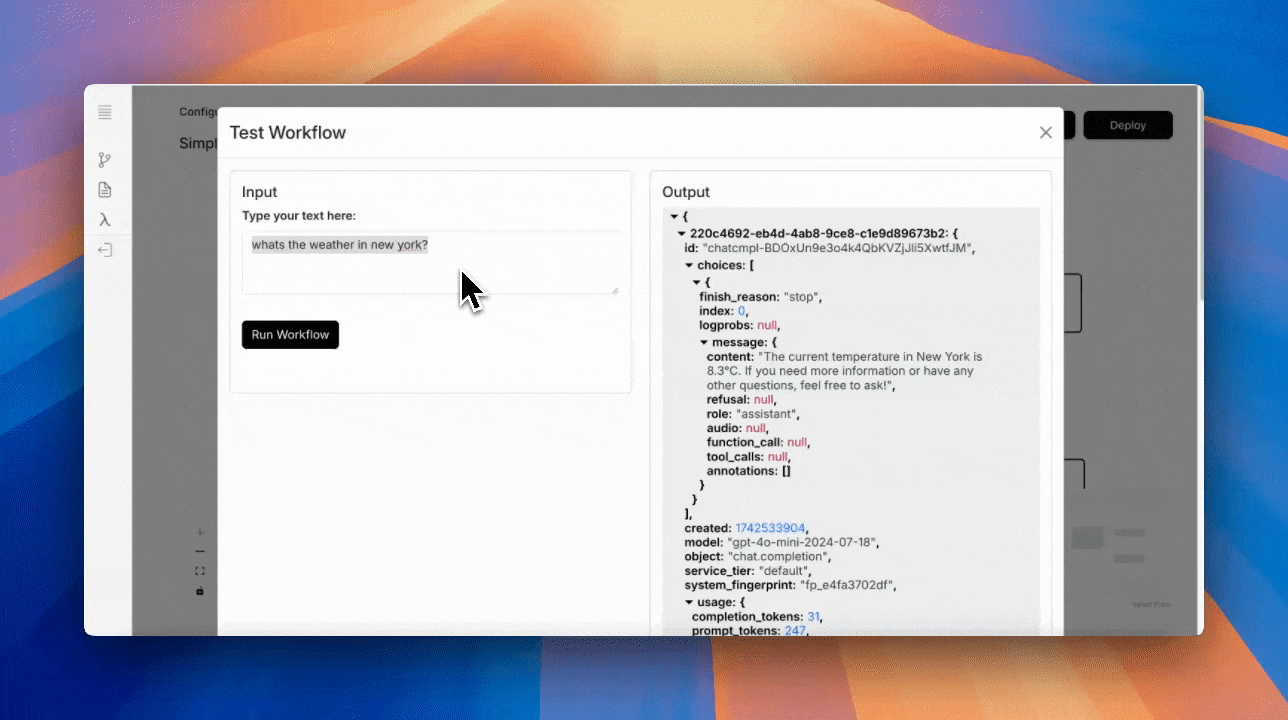
Test Workflow
One thing you'll note here is that when the LLM decides to make a function call, it extracts the following:
"tool_calls":[
    {
        "id" : "call_OZPtqSQMygllqfYWqrlpBjtt",
        "function": {
            "arguments" : "{"location":"New York"}",
            "name" : "weather_agent"
        },
        "type" : "function"
    }
]
If you notice the arguments, we see that the LLM extracted location in a dictionary "{"location":"New York"}"
following the schema we defined earlier when creating the tool. This is why we altered the weather block code the way we did
here:
class CustomBlock(BaseImplementation):
    ...
    def run(self, input_:dict=None):
        # First we get the incoming block's data like we did before
        input_ = list(input_.values())[0]
        # Then we adhere to the function calls format to get location
        input_ = json.loads(input_)['location']
        ...
Finally let's do one last query:
Note: As you see in the video, we do <reset_memory>. This clears out any previous memory/conversation you had
with the LLM. This is subject to change in future release.
And that concludes this tutorial on how to make a weather agent. In this tutorial we covered:
- How to use a custom block to create a weather agent
- Adding tool call during LLM configuration